Drafting Table: an engineering sketchbook
I got a Wacom MovinkPad 11 drawing tablet a few months ago as a portable replacement for my ancient Wacom Bamboo USB drawing tablet. Overall it’s been great. I’ve been using it for illustrating blog posts and making engineering sketches for work and personal projects.
I’ve enjoyed Clip Studio for actual “art”, but haven’t found a program I like as an engineering notebook. Historically I’ve used a combination of paper notebooks and slide decks for engineering sketching and documentation, and the ideal tool for me would have the features of both.
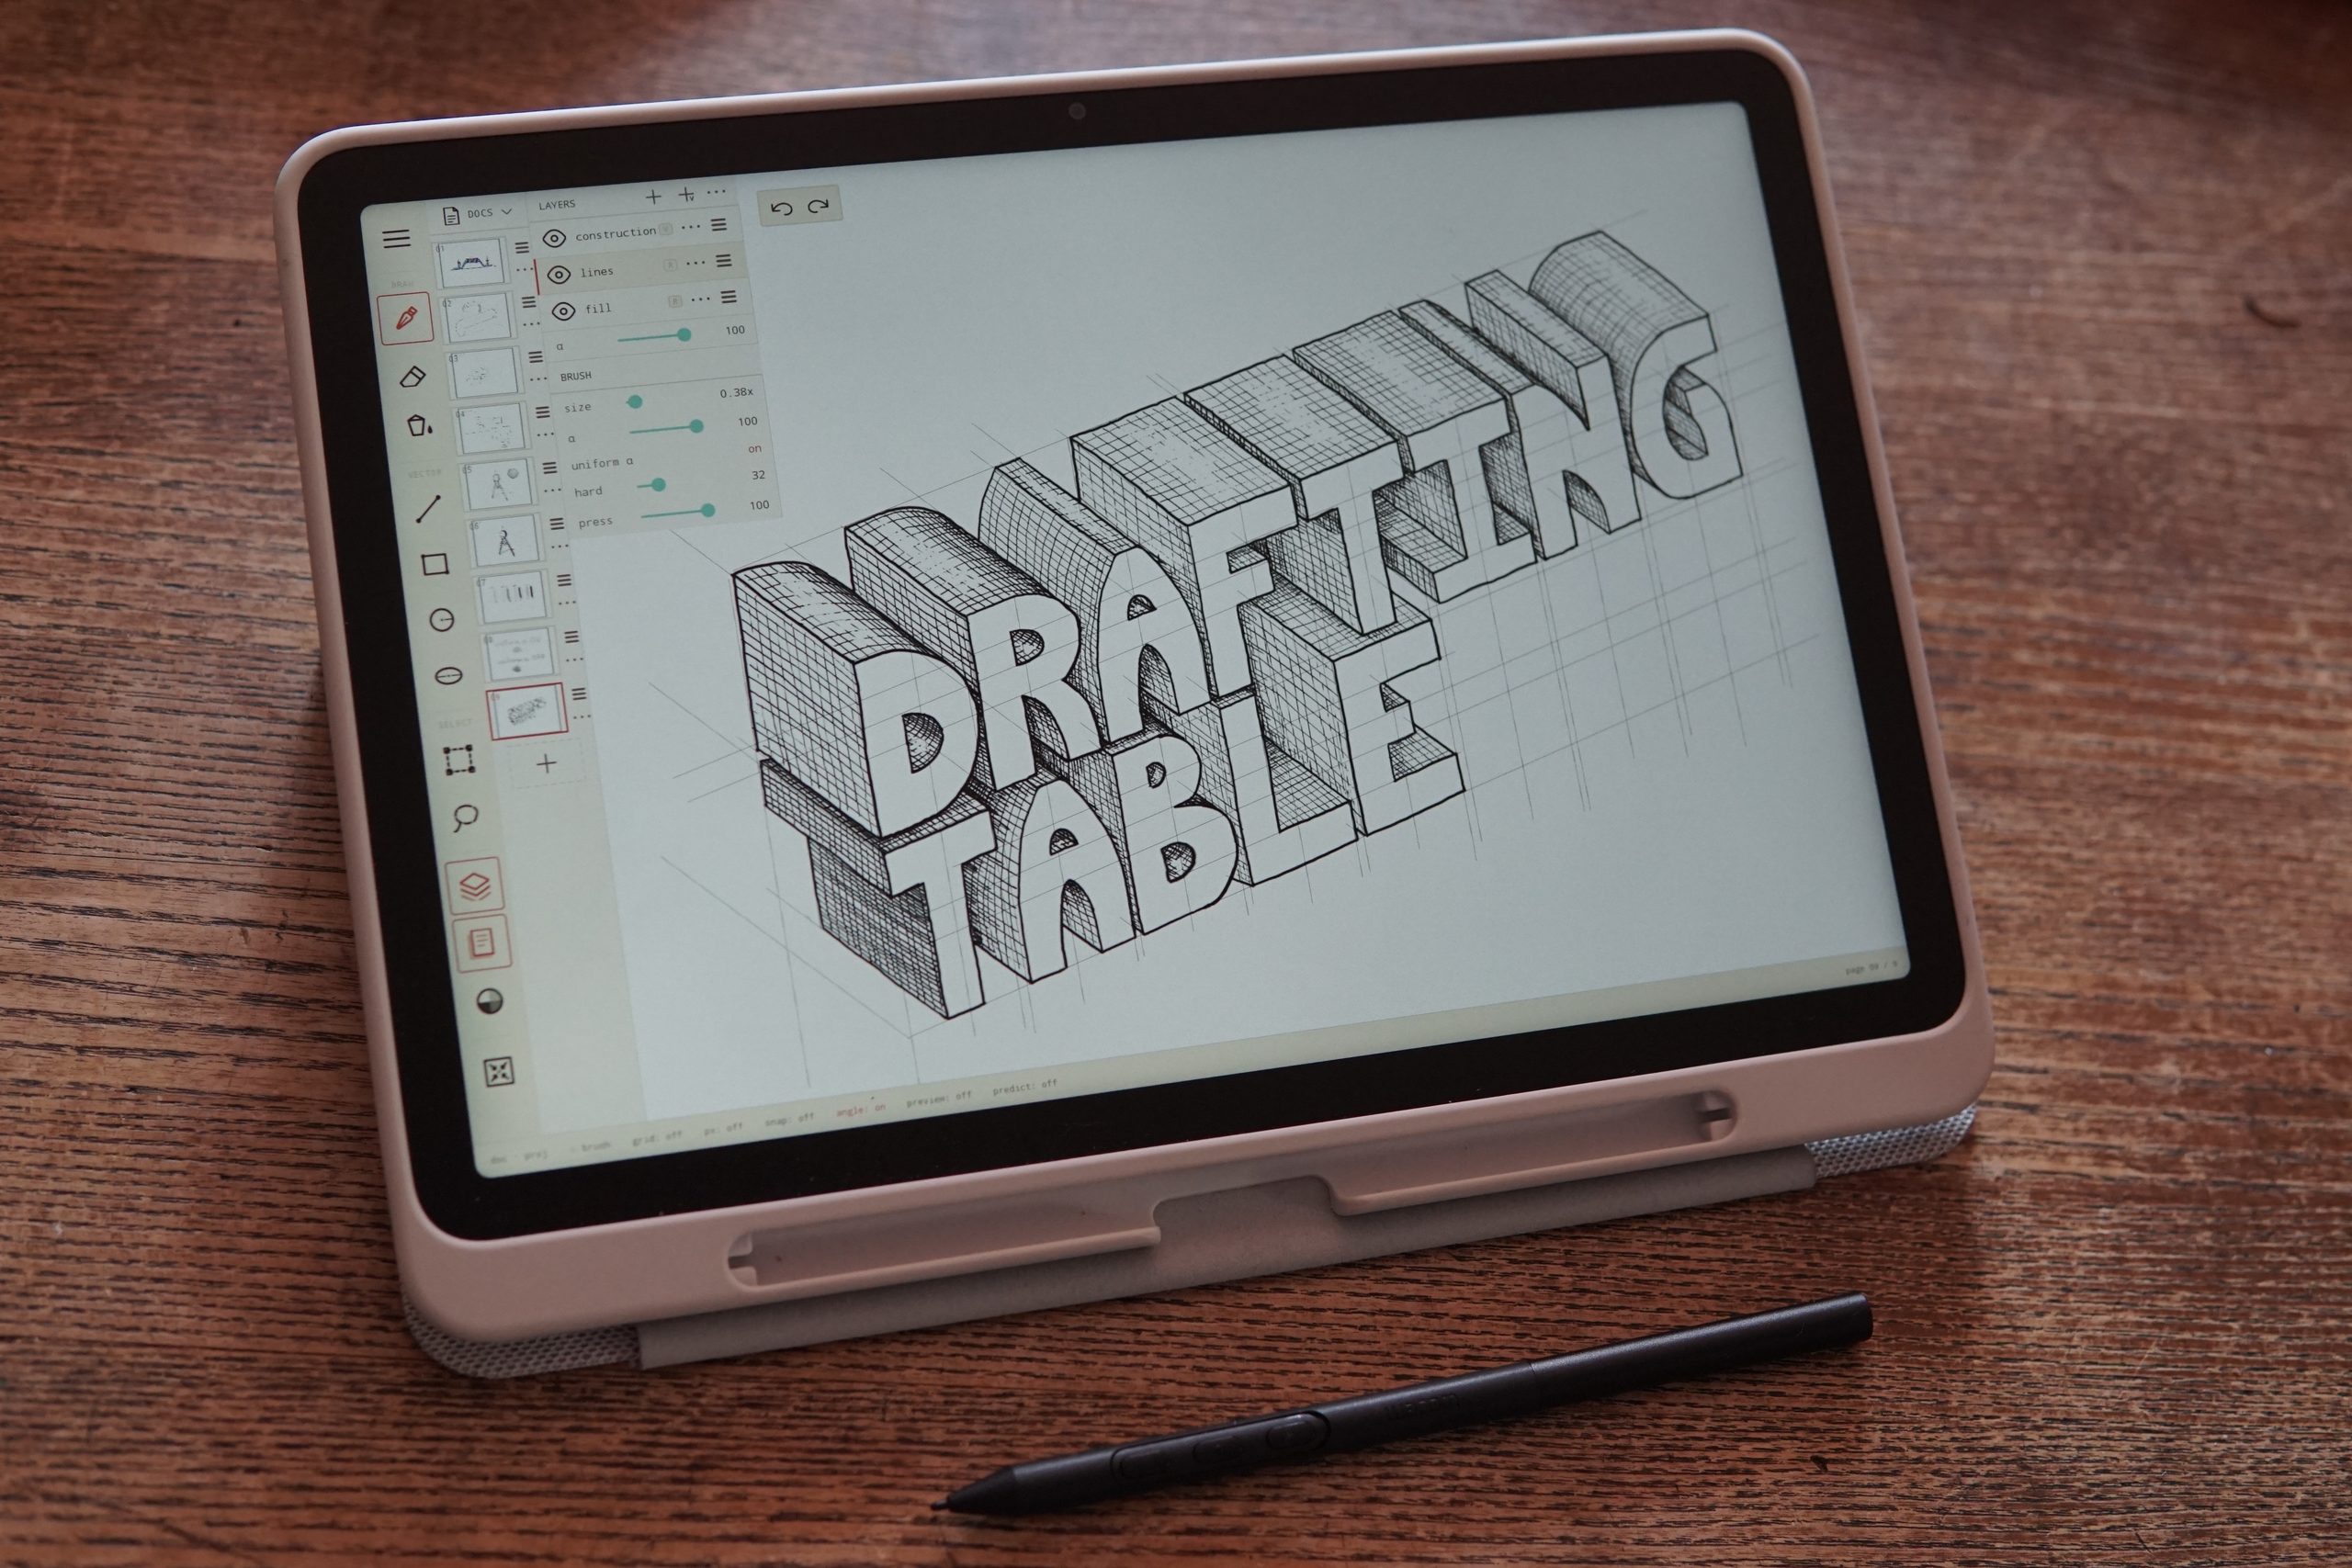
To fill this niche for myself I’ve been working on Drafting Table.
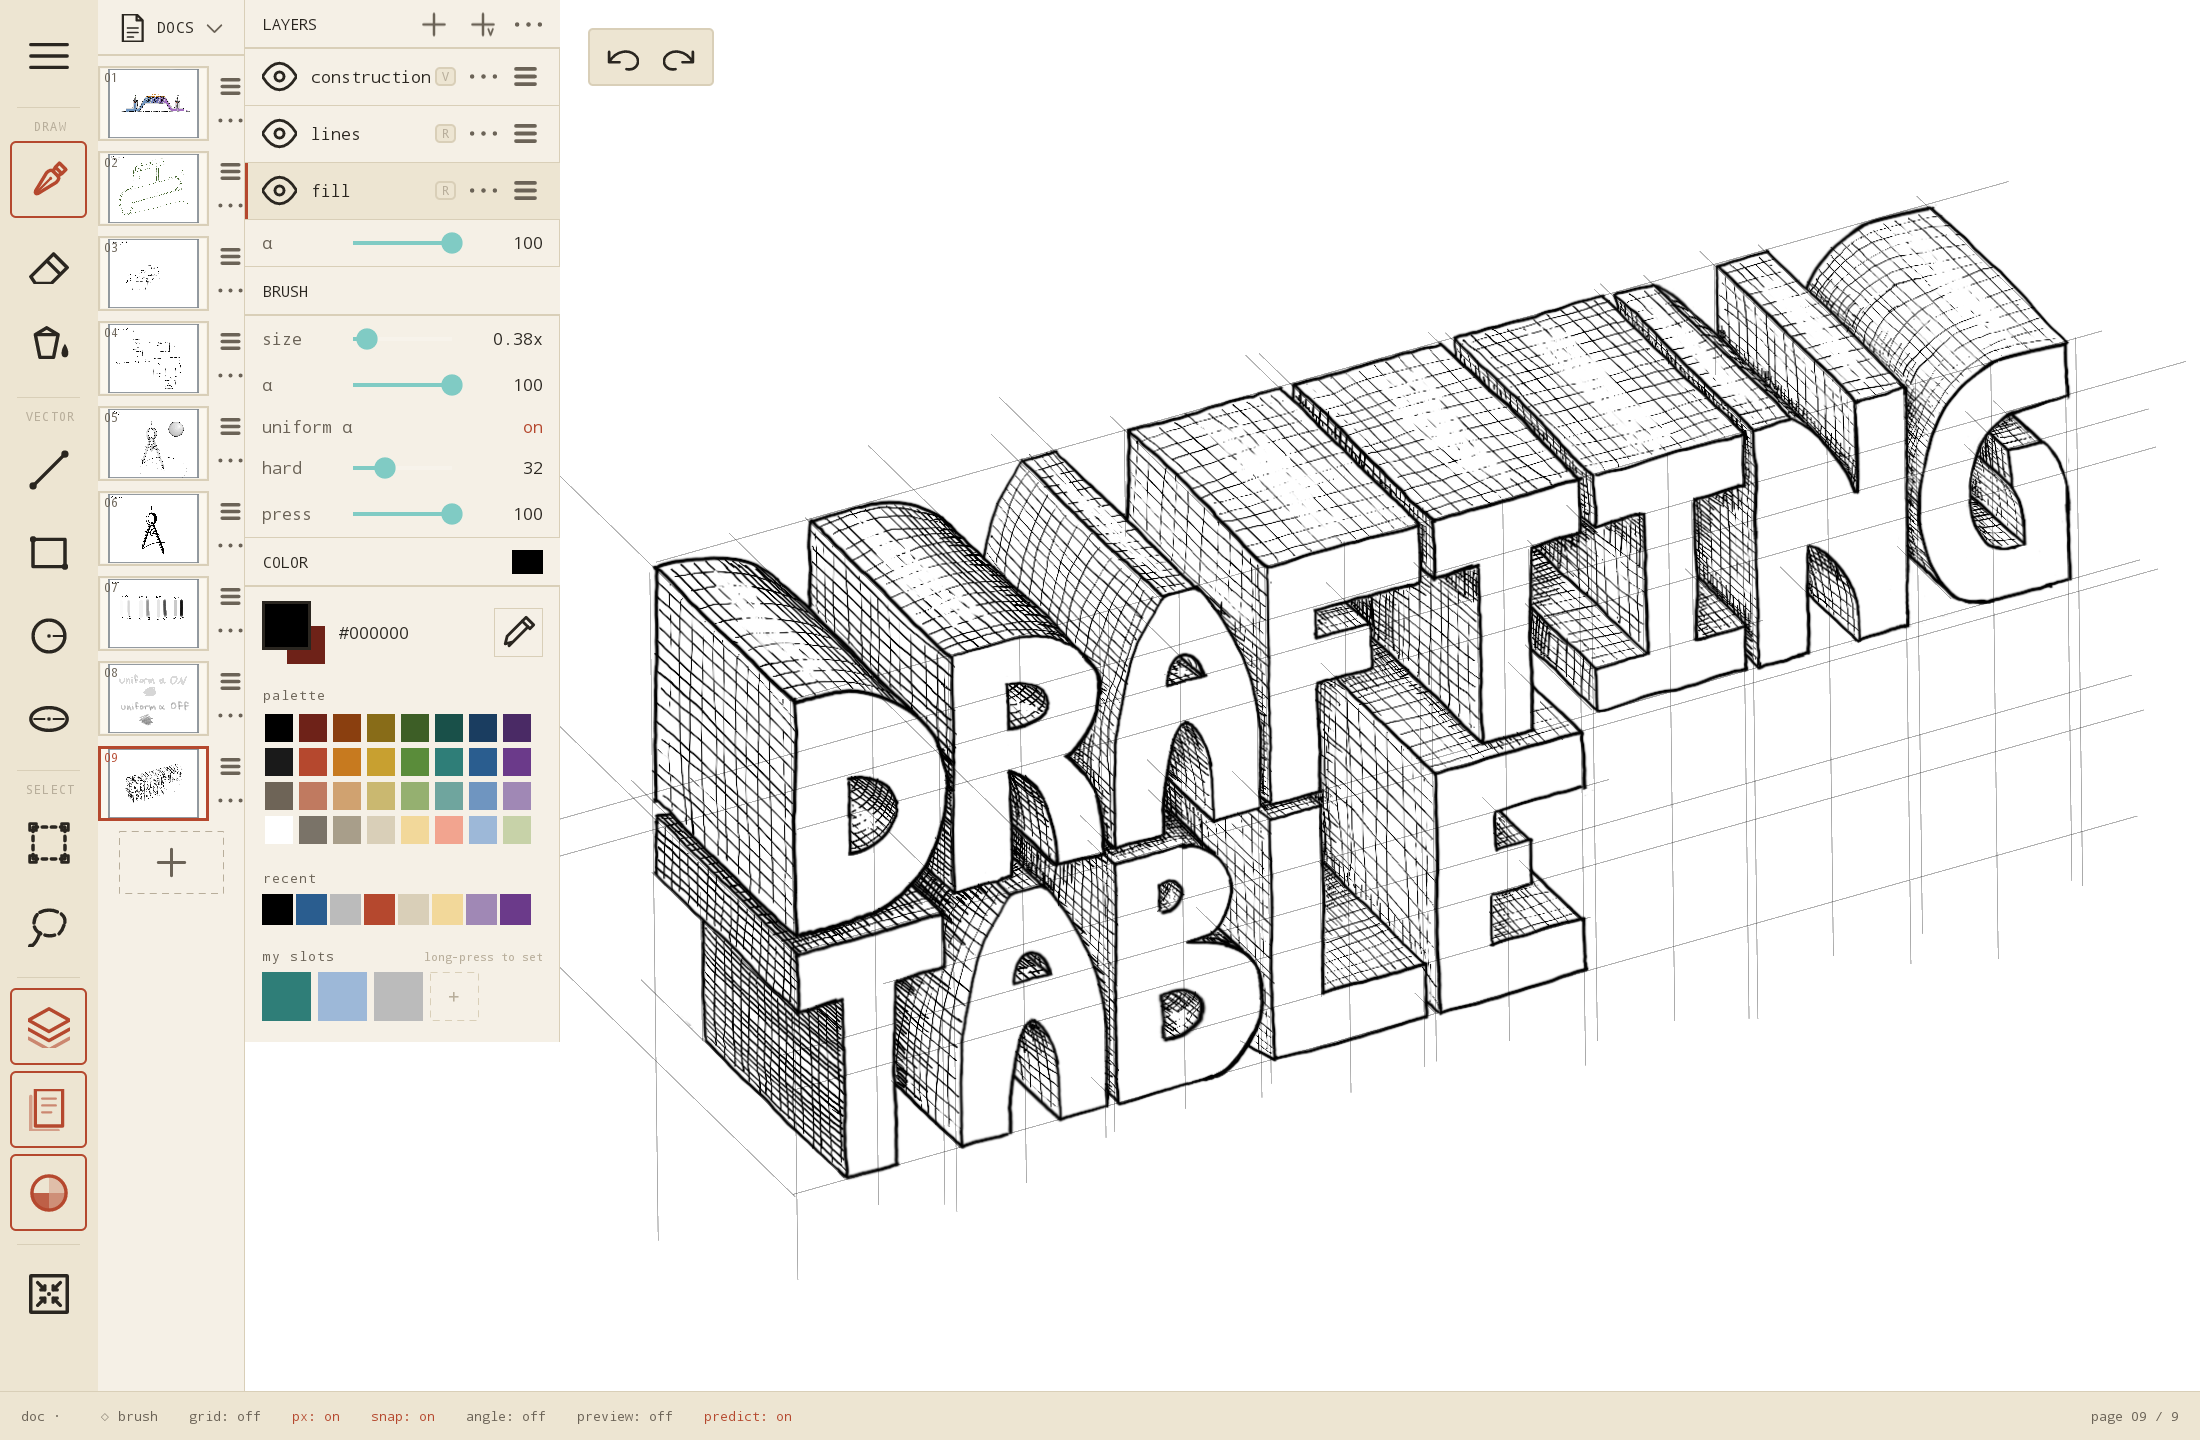
Here’s what it looks like. On the left is the main toolbar for choosing between the brush, eraser, selection, vector tools, etc. The column to the right of that (which can be hidden) shows previews of all the pages in the current document, slide-deck style. Tapping a page preview switches the active canvas to that page. The third column shows the layers, pen controls, and color picker. The status bar on the bottom has toggles for the background grid, vector point & angle snapping, brush outline preview, and stylus position prediction.
A year ago I would have never attempted a project like this (having neither the expertise or interest in developing Android apps), but the barrier to entry is much lower now. To get started, I put together an initial list of the features I wanted this imaginary program should have:
- Documents organized by pages, and a preview pane of pages, slide-deck style
- Each page within a document is an independent drawing canvas
- Pages have independent sets of layers
- Basic drawing tools: minimal brush & eraser set with pressure sensitivity, paint bucket, color picker, brush opacity
- Simple vector primitives (lines, rectangles, ellipses, etc) for making construction geometry. Vectors should be editable after creation.
- Snap to end or mid-point, angle, or grid for vector tools
- Background grid. C’mon Autodesk Sketchbook, why don’t you have this!
- Basic selection, transformation, cut/copy paste for raster and vector objects
- Image import & transformation
- Drawing should feel snappy! Minimize pen-to-glass latency.
I passed these notes to my intern Claude, and got cracking. The rough progression was: figure out the architecture and get something to build, since I’ve never worked on an Android app before; implement the base set of features; use Claude Design to come up with a usable UI, and plumb up all the features to the new UI; actually use the program day-to-day and find bugs, things I don’t like, and missing features, and iterate.
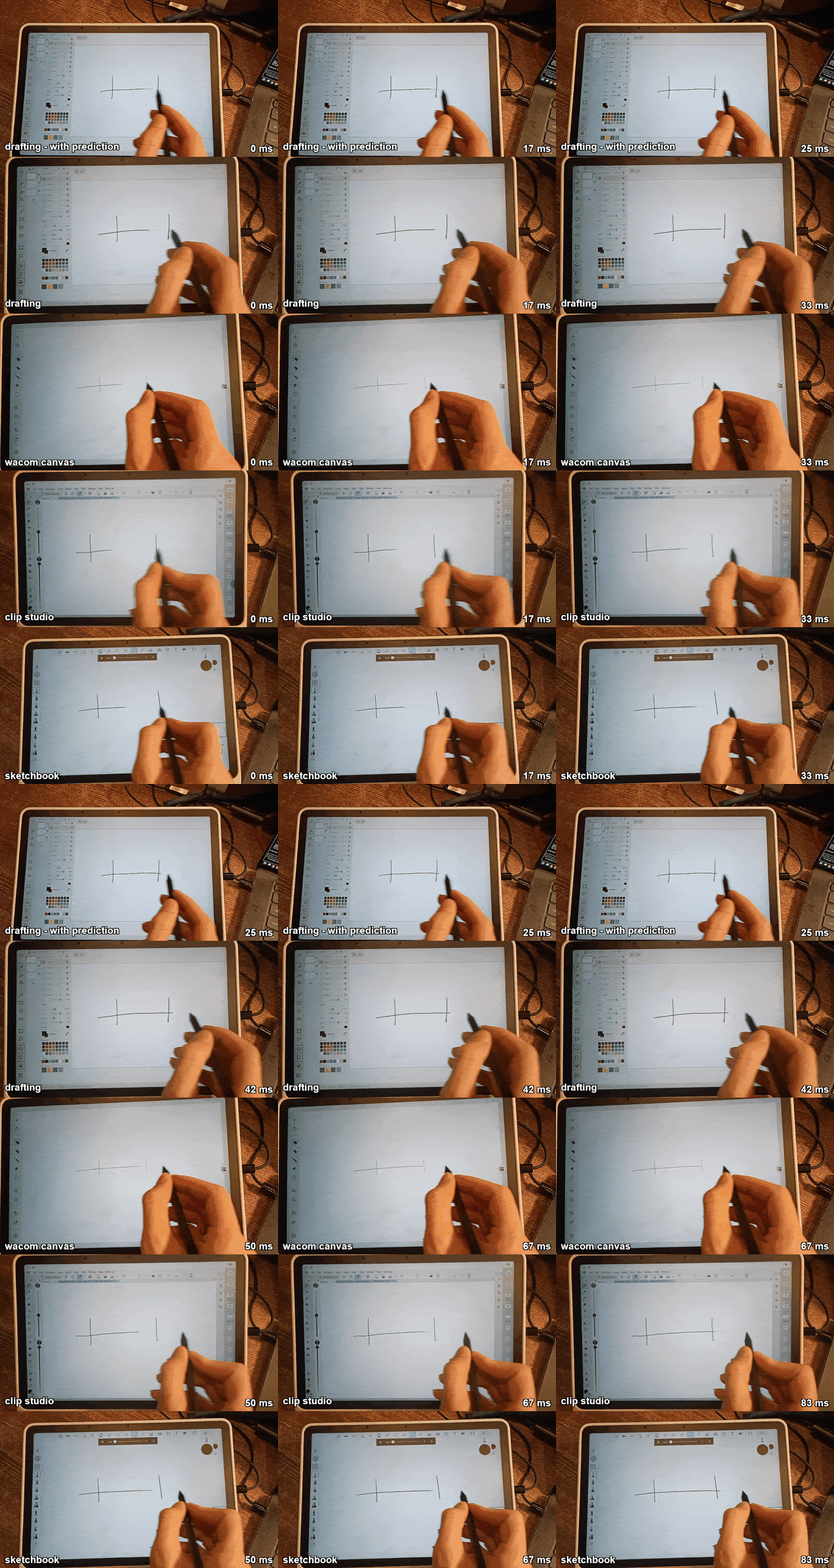
One detail I’m pleased with is how responsive the drawing is. The low-latency brush strokes work basically as described in this Android Developers blog post. I did some pen-to-glass benchmarking against other drawing programs (with all filtering/smoothing turned off) with my phone camera recording at 120fps. The latency counter is based on the number of camera frames between the stylus passing the vertical line on the screen, and the rendered stroke crossing the vertical line. The timing resolution is only 8.3ms here, and there’s some aliasing with the 11ms screen refresh rate, so it’s not a great measurement, but it gets the general feel across. Off-the-shelf programs were surprisingly slow, with ~70ms or more latency. Baseline, drafting table clocks in at ~40ms, and extrapolating forward the pen position shaves off another 10-15ms. I have the prediction as a toggle-able option; I’ve generally preferred having it enabled, but it is a little bit strange to use for things like fast handwriting.
Sorry about the aspect ratio:
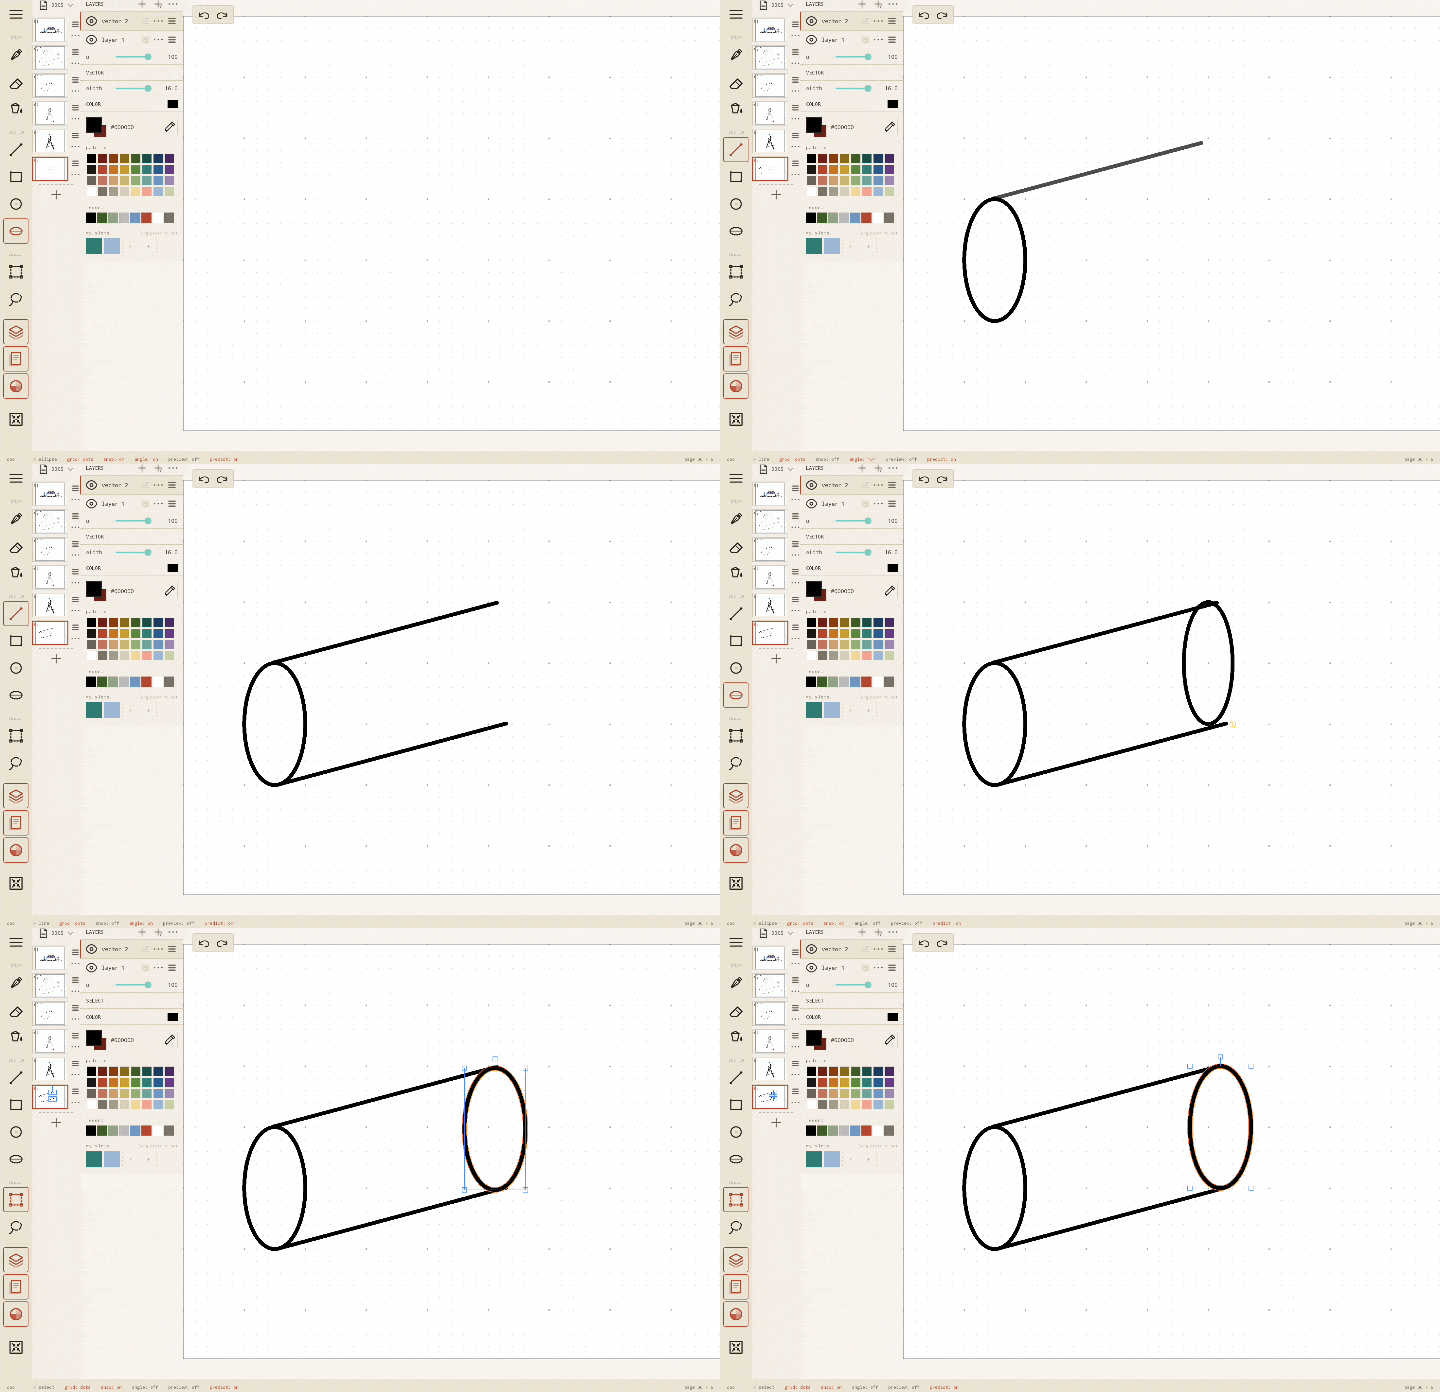
A brief look at some of the vector tools in the gif below: snapping to the background grid, snapping the start of line segments to points on ellipses, locking the lines to a 15 degree angle and transforming an ellipse after drawing it. Position and angle snapping are both toggle-able from the stylus buttons, so they can be enabled or disabled mid-stroke; for example when you want the beginning of a line to snap to a point, but the end to be free.
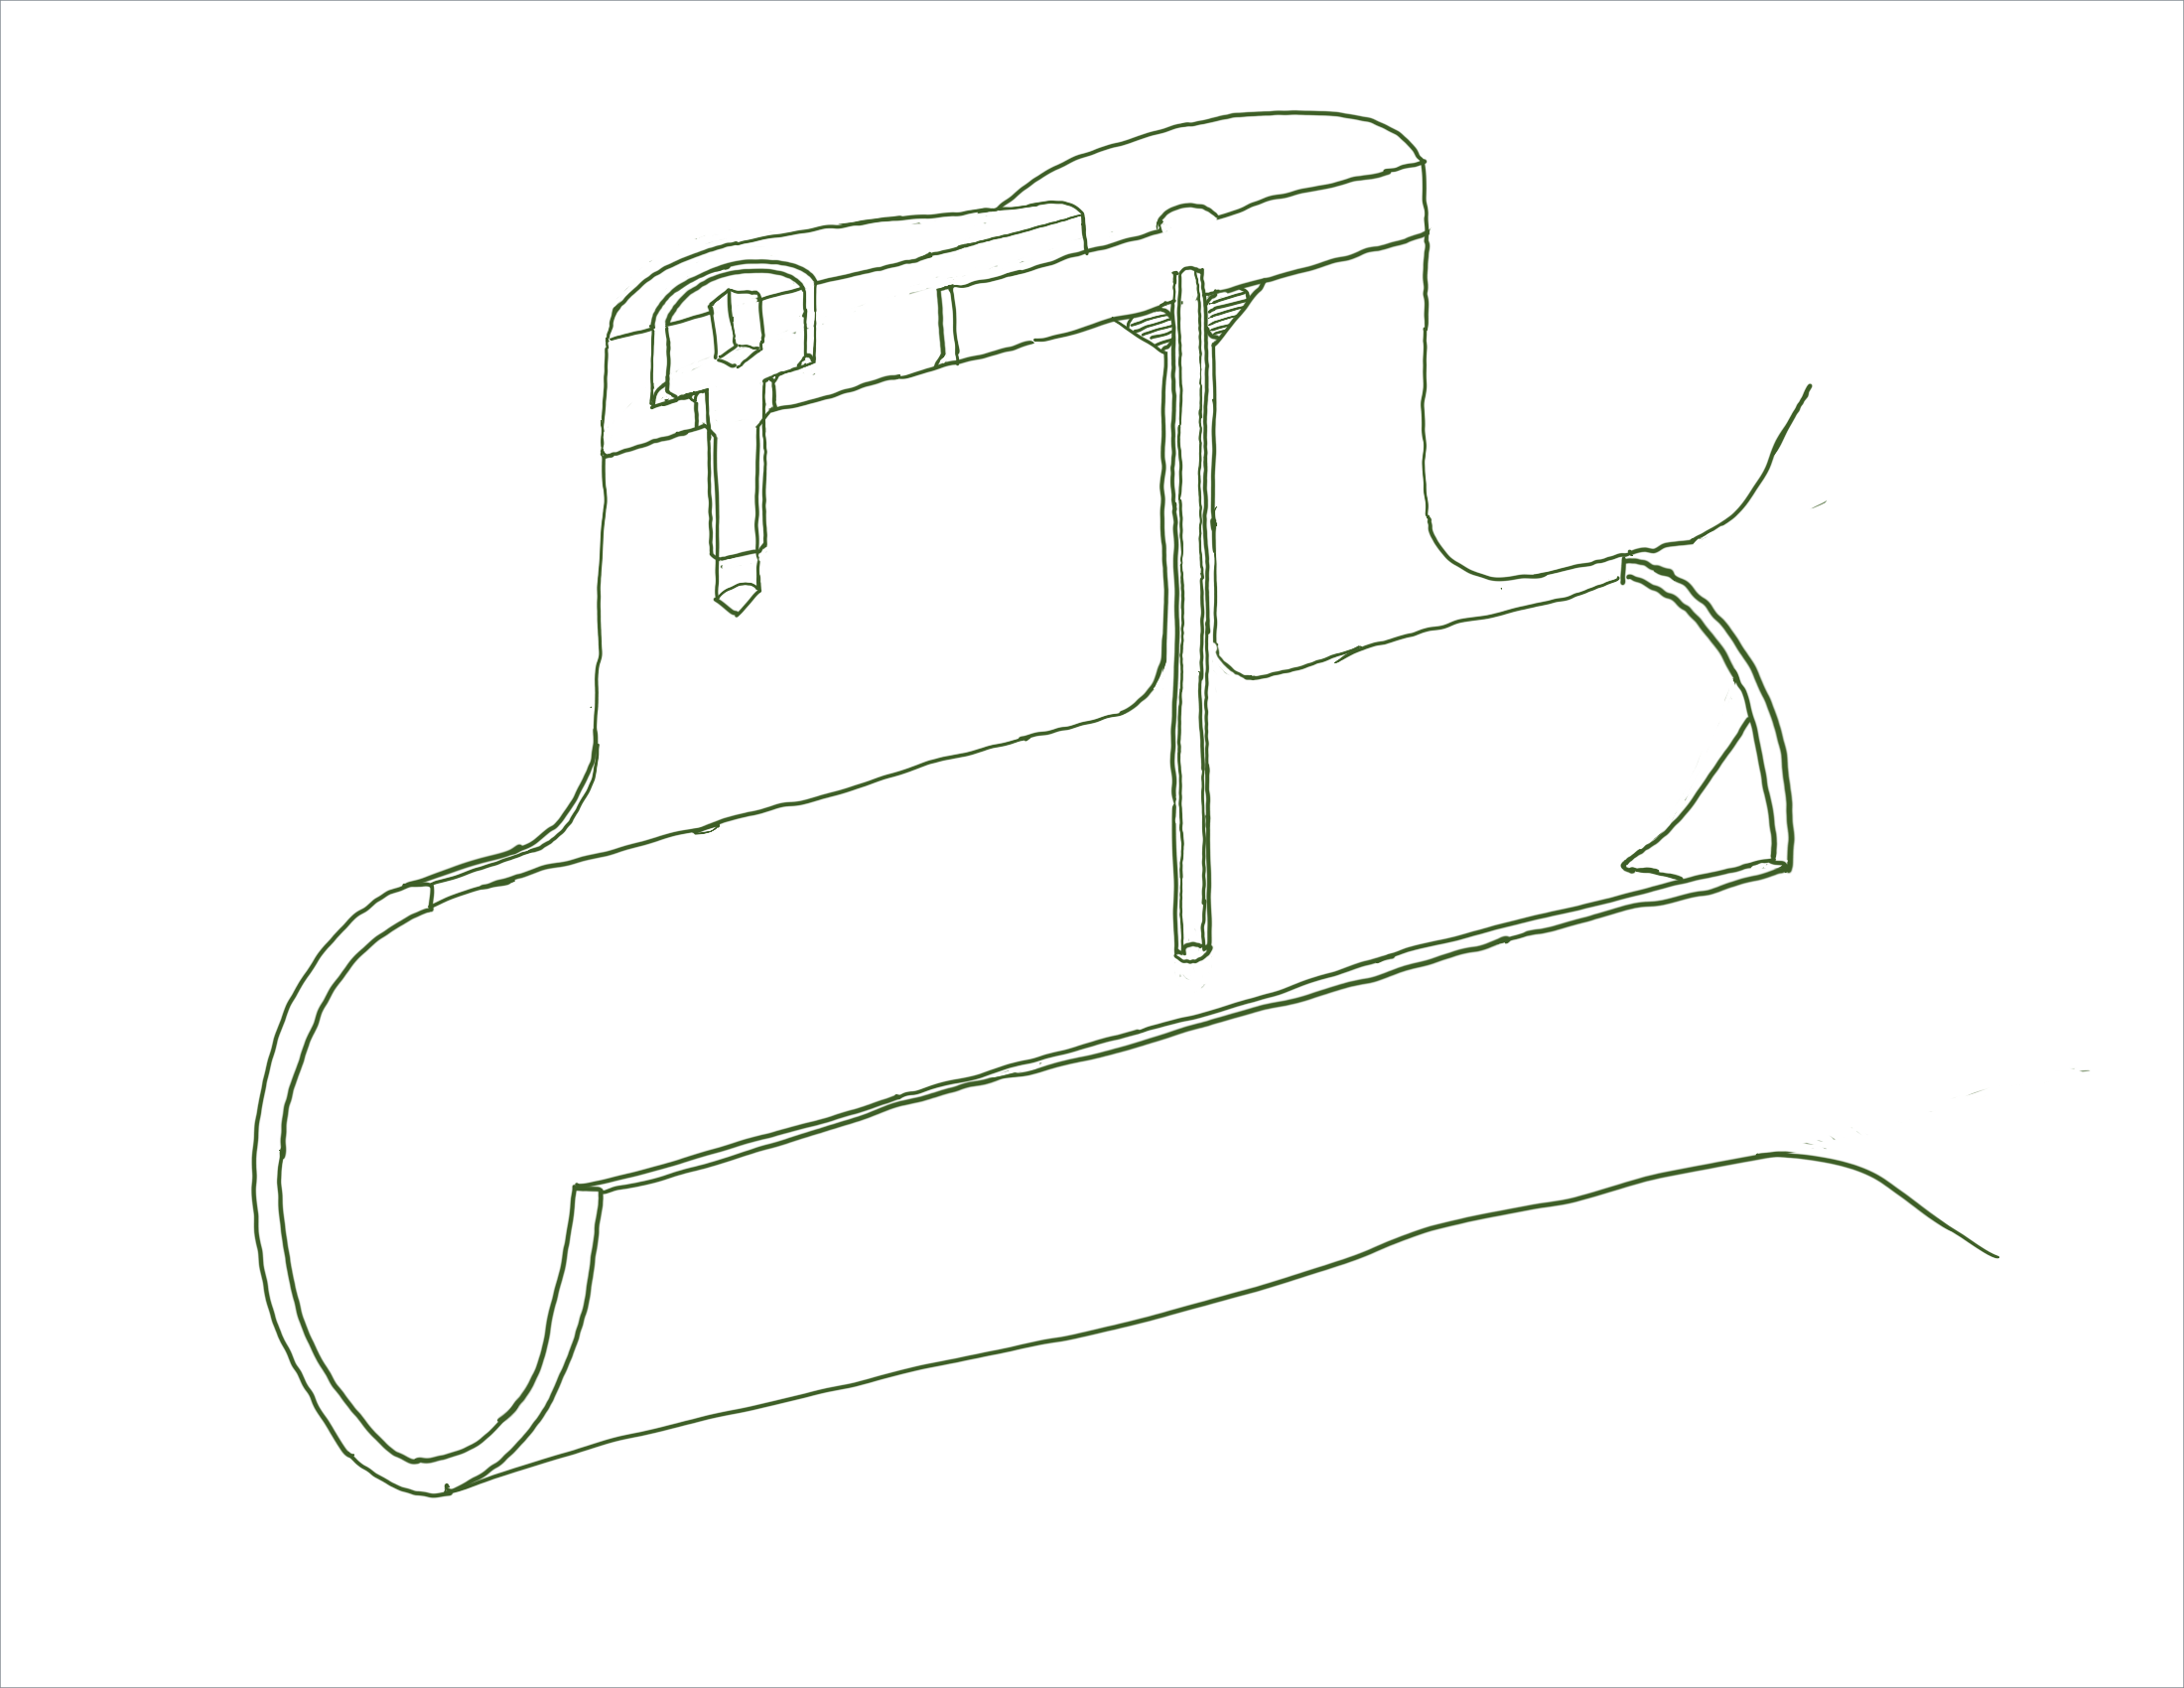
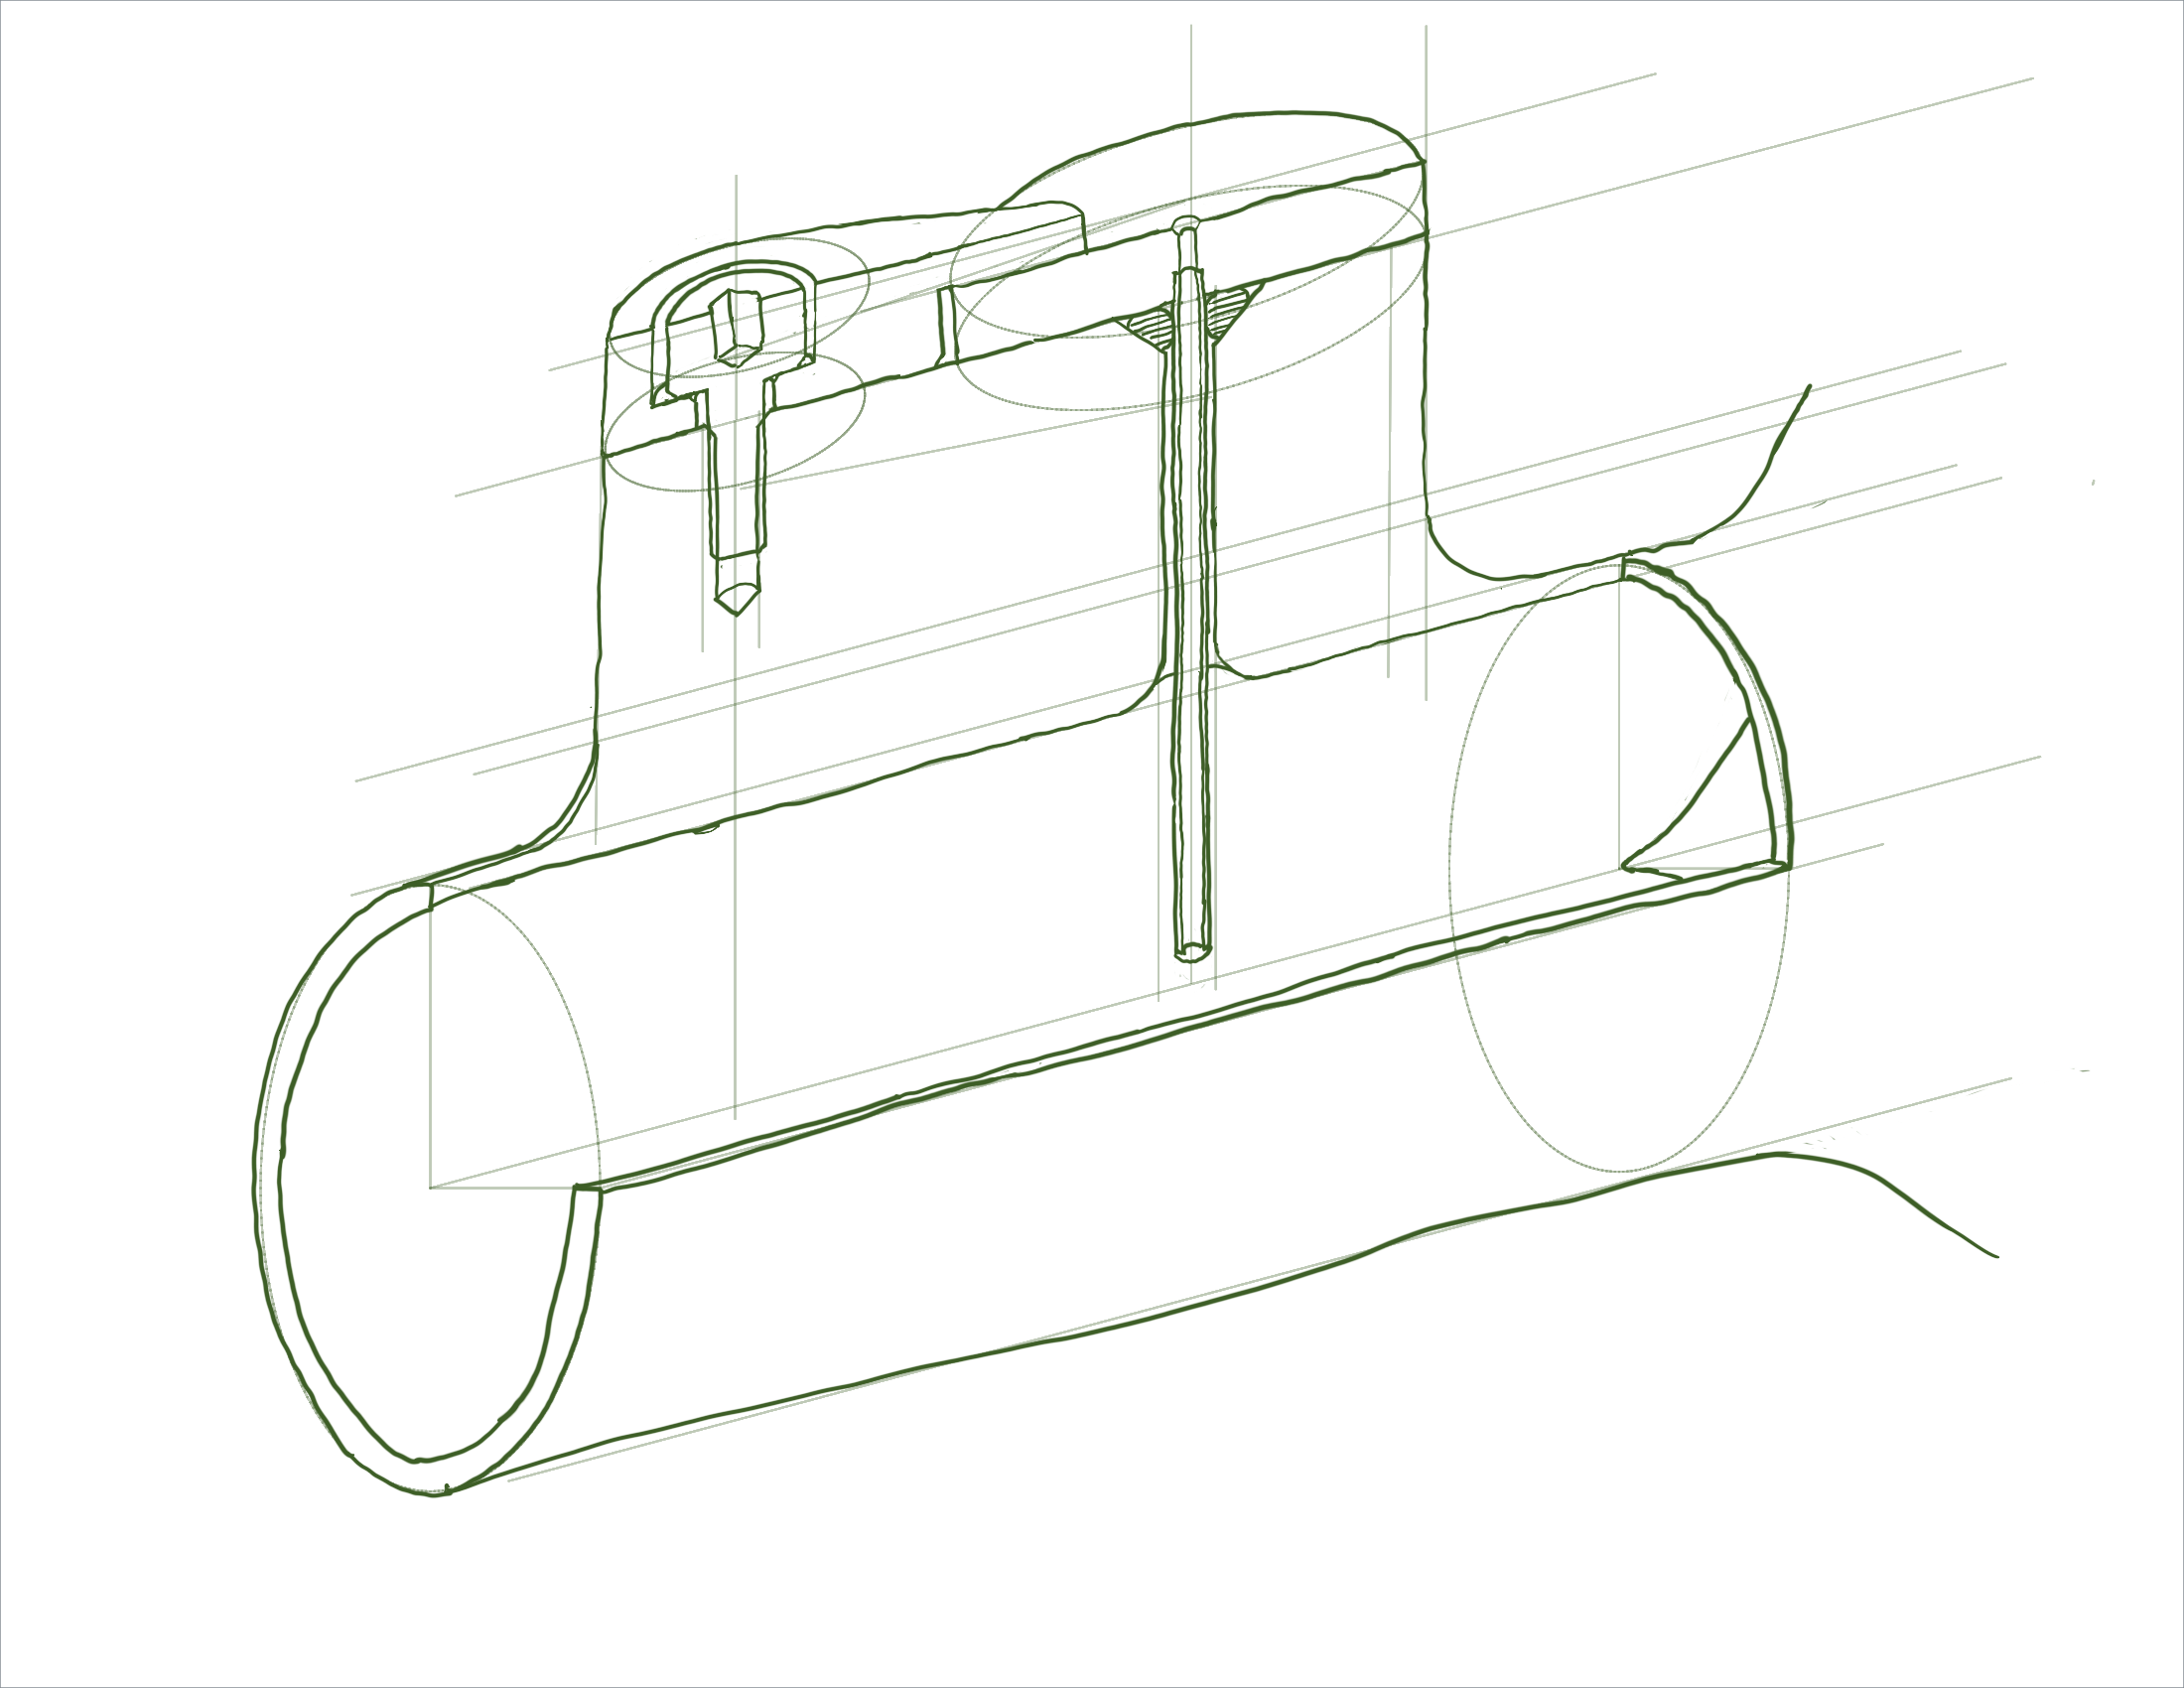
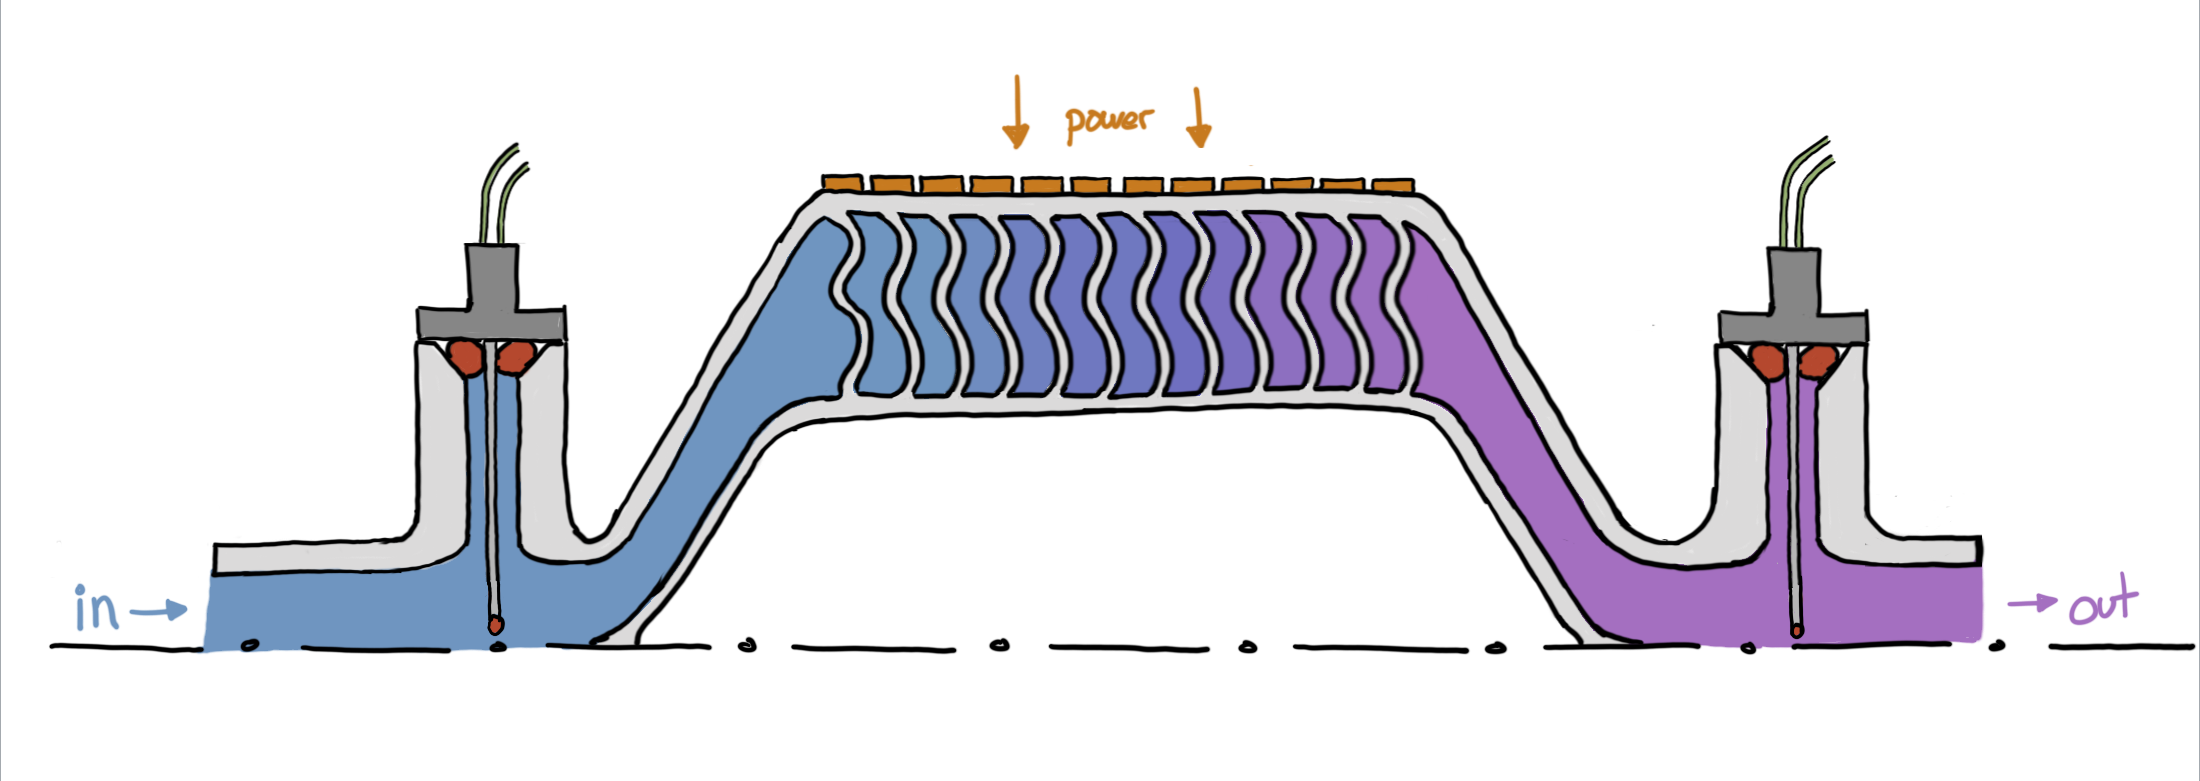
Here are a few sketches from a project I’m getting back to - I often draw things like cross-sections and iso-views, so having vector construction geometry is extremely useful.
And a quarter-section sketch with and without vector construction geometry shown.
A few features I added after spending some time using the program:
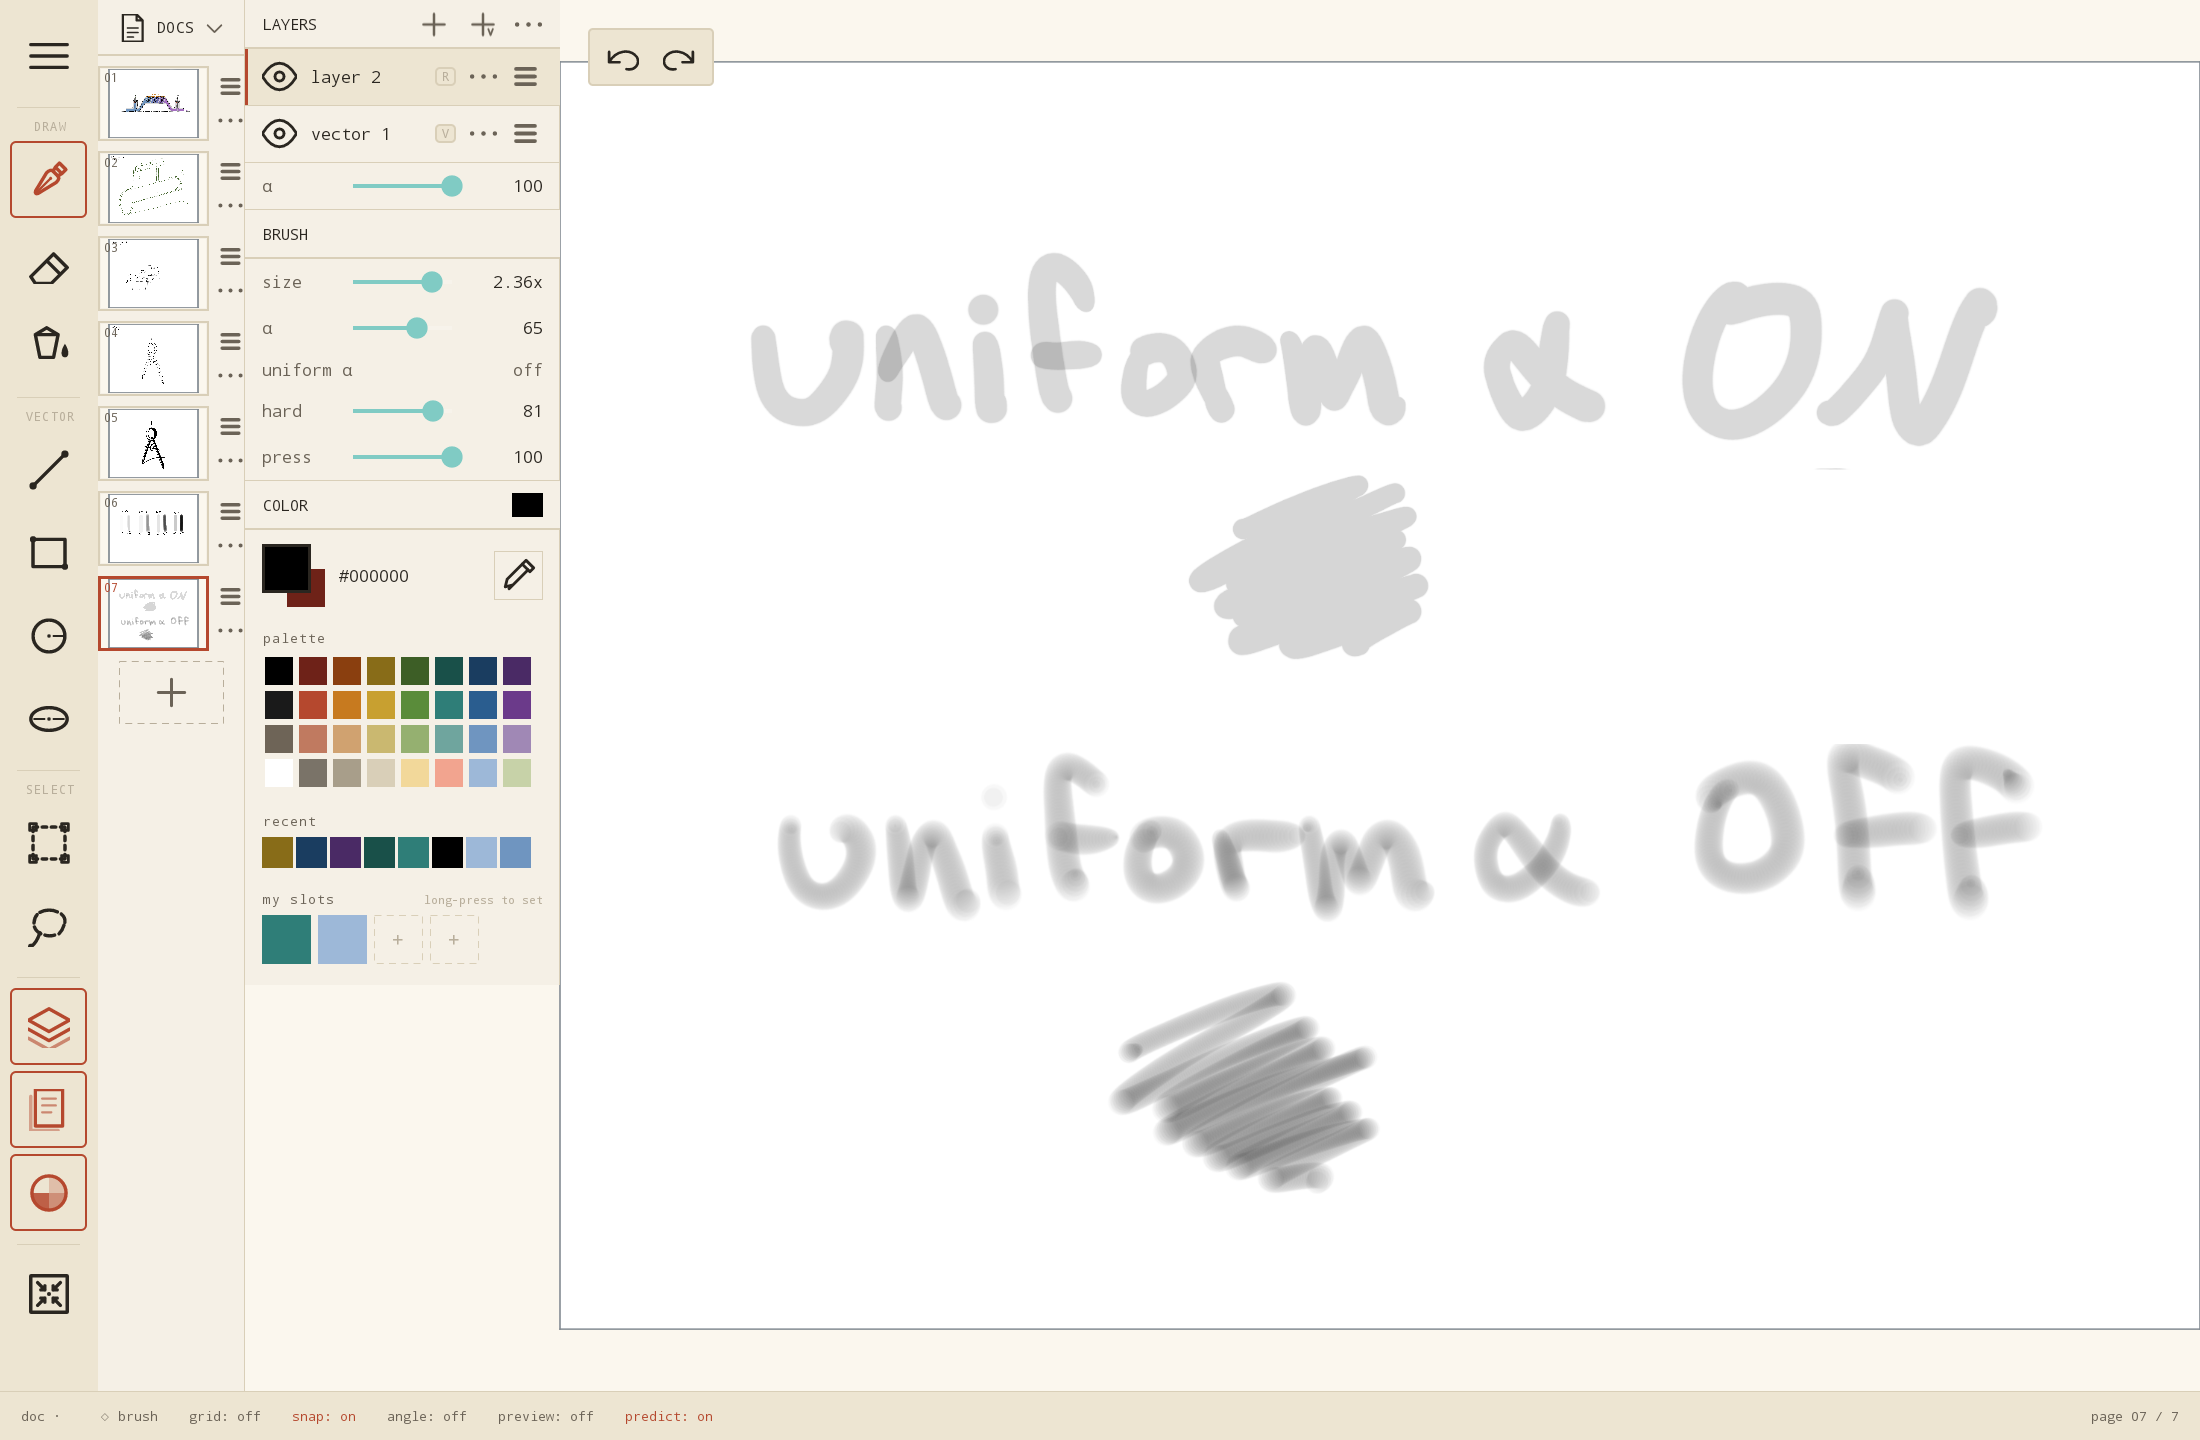
Fixed transparency within a stroke: toggling “uniform alpha” in the brush controls fixes the transparency of a stroke, even when the stroke overlaps itself. This is nice for shading with a translucent brush. Toggled off, brush opacity stacks within a stroke.
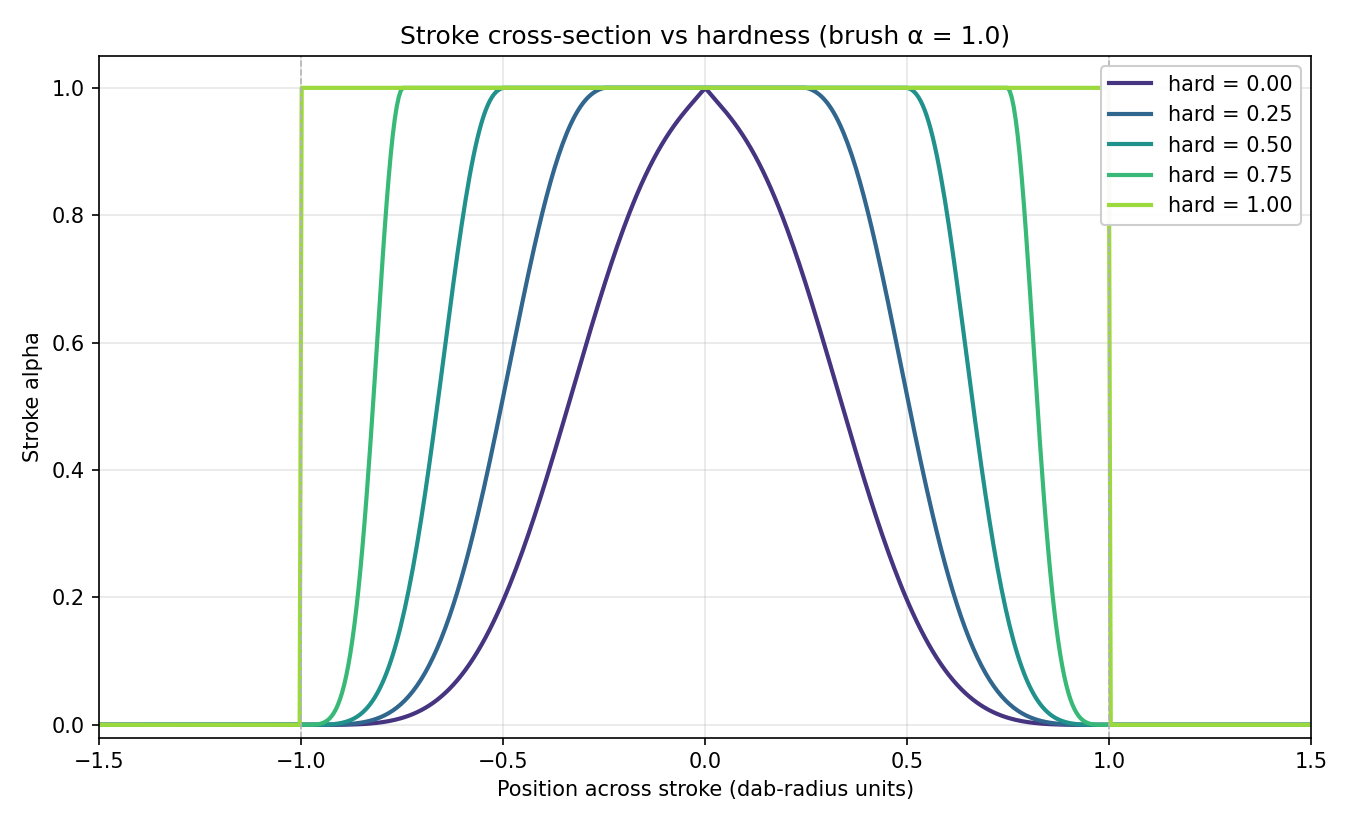
Brush pressure & “hardness” sliders: the pressure slider sets the pressure the brush size saturates at - so with the slider set to 0, the brush is always maximum size at any pressure. The “hard” slider sets the transparency gradient from the center to the edge of the stroke. When set to 100, the whole stroke is fully opaque (α=100). When set to 0, the stroke tapers from α=0 at the edges to α=100 at the center of the stroke. I usually have this set to ~40 for nice smooth-looking lines. Here’s a plot of what the hardness slider does over the width of a brush stroke:
Brush preview: see a brush size circle preview when hovering the pen - I leave this off most of the time, but I like it for precise, sharp-edged erasing (with the brush pressure threshold turned all the way down).
Canvas pixel preview when zoomed in: pixel outlines can be turned on at high zoom levels
It took me way too long to add a real color picker and eyedropper. The eyedropper had a fun coordinate convention bug where it was sampling the color from the a mirrored position on the screen, which was very confusing to debug.
And the list will definitely grow. Currently the only brush shape is “circle” and the pen tilt isn’t used for anything, so I may add some slightly fancier brush tools eventually.
It’s definitely not perfect, but it’s good enough that it’s the tool I actually reach for.
If you want to try this, you can download the source from the git repository and follow the build instructions in the readme.
Comments